Create Set of Books (Advanced - MSSQL)
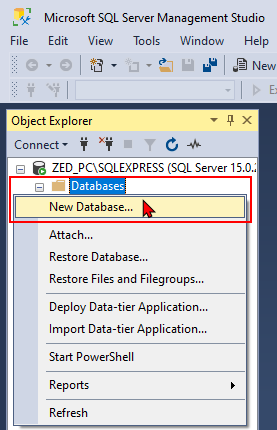
Before creating a MSSQL Database type (Set of Books), you need to add a blank database in Microsoft SQL Server.
This option allows you to create your own Set of Books, from scratch, without using any of the Sets of Books (templates) which TurboCASH5.2 has already included for you to select and customise according to your needs.
|
|
Using this option, you may select to create a Set of Books with a 4-digit (up to 8-digit) accounts structure. The Set of Books will then allow you to create the following number of digits:
|

|
|
This option should only be used by advanced users. |

When creating a Set of Books with this option, you basically have to start from scratch. No Batch types, Groups or Accounts will be available. You have to create, define and link them yourself.
When completing the Setup process in this option, your Chart of Accounts will basically consist of three accounts (Debtor's control, Creditor's control and Retained income / earnings). You then need to create all your Ledger accounts, Bank accounts, Creditor accounts, Debtor accounts and Tax accounts.
|
|
When you use this option, you need to Close the Set of Books if you have a Set of Books currently open. |
To create a Set of Books using the Advanced option:
- On the Start ribbon, select Create Set of Books (F10).
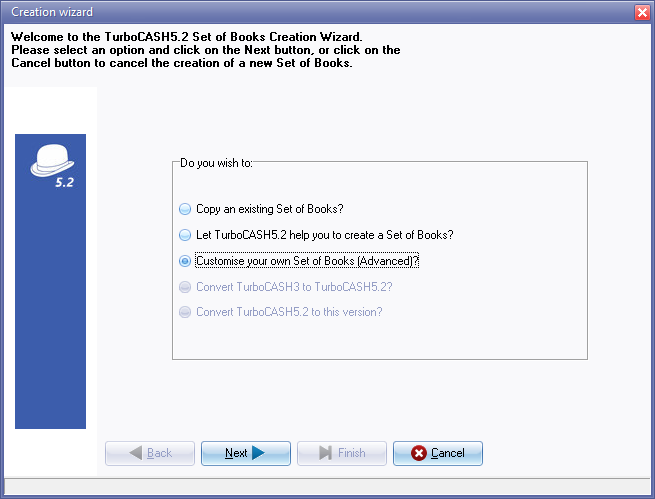
- TurboCASH5.2 automatically defaults to the option “Let TurboCASH5.2 help you to create a Set of Books?”, as this is the recommended option for most users. Select the "Create a Set of Books (Advanced)?" option.
- Click on the Next button.
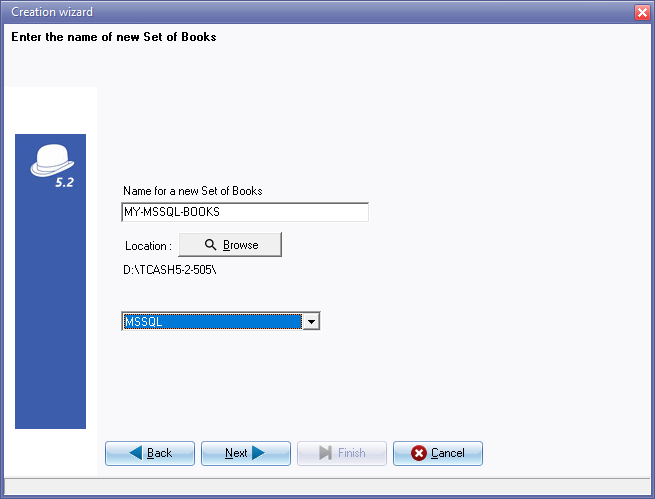
- Enter the name for your Set of Books.
|
|
The name must not already exist and may not be longer than 50 characters. This name will help you to identify the Set of Books on your system. You will need to select this name whenever you need to open the Set of Books or perform some other functions on the Set of Books. |

|
|
The Directory in which you create the Set of Books is displayed underneath the Location Browse button. It will usually be the default directory in which osFinancials is installed or directory, which you have specified when you installed osFinancials. If you wish to create your Set of Books in any other directory or location on your system, you may click on the Browse button to select any folder or drive on the Pick a directory screen. |
- Check the location where you wish to create the Set of Books is correct, and click on the Next button.
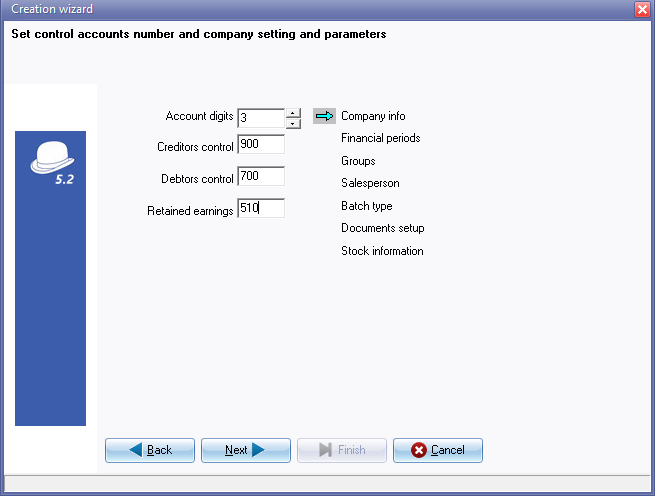
- The default number of account Digits is 3. Enter a three character numeric code for each of your Creditor's control, Debtor's control and Retained income / earnings accounts (e.g. 900, 700 and 510).
|
|
Using this option, you may select to create a Set of Books with a 4-digit (up to 8-digit) accounts structure. The Set of Books will then allow you to create the following number of digits:
The codes or numbers for these accounts should be carefully planned in the Chart of Accounts you wish to create. |
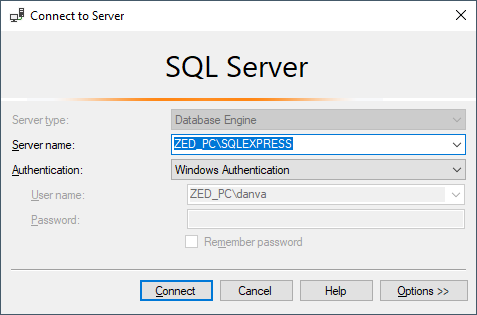
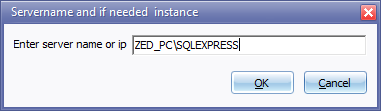
- Click on the Next button and Enter the name of the Server (and instance if required)
- Click OK and enter the name of your Database (already added in MSSQL Server)
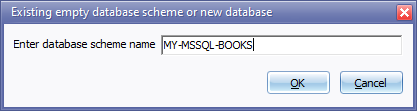
- Click OK.
- Click Next to initiate each of the set up options listed on the right-hand side of the Creation wizard screen. Enter and select the necessary information and settings for the following screens:
- Company info - Enter all your business' details such as the address, e-mail address, contact numbers and Company and Tax Registration numbers, which you need to display on all documents, reports, and lists. You may also select the Tax method applicable to your VAT/GST/Sales Tax registration, whether your default output option for documents, reports and lists are on: screen, printer, file, e-mail or fax. You may also load a logo picture to be displayed on your reports or documents, and set your Windows operating system's default date and currency formats.
- Reporting dates - This option allows you to set up the number of reporting dates required, and the start date of your financial year period. The periods or dates will be displayed in the format in which you have set your Windows Operating System's default date on the previous screen.
|
|
The start date of the financial year is the first day of the calendar month in which the Set of Books (Advanced option) is created. For example, it it is created on 20 August 2021, the Start date is 1 August 2021, etc. |
|
|
Before the "Reporting dates" screen is launched, a message will be displayed. Periods are not there Click on OK to launch the "Reporting dates" screen. |
- Batch types - This option allows you to create, delete an existing batch type, or change the name of an existing batch type in which you wish to enter and update or post your transactions to the ledger.
- Groups - This option allows you to set two Reporting groups for your General ledger accounts, Debtors, Creditors, Stock and Document groups.
- Salesperson - This option allows you to enter the salespersons names who will be selling your stock items, or selling services.
- Documents setup - This option allows you to set up your documents Invoices, Credit notes, Quotes, Orders, Purchases and Supplier return documents, you wish to hand to customers (debtors) or suppliers (creditors) when you sell, or quote, or order and purchase, physical stock items and services set up in your stock item code file.
- Stock information - The option allows you to define the units of stock you sell and the selling price descriptions and to set the Cost of sales parameters. This option should only be used if you use stock and / or wish to generate documents (Invoices, Credit notes, Quotes, Orders, Purchases and Supplier returns).
- After the last setup screen (i.e. Salesperson) is closed, the Next button will change to the Finish button.
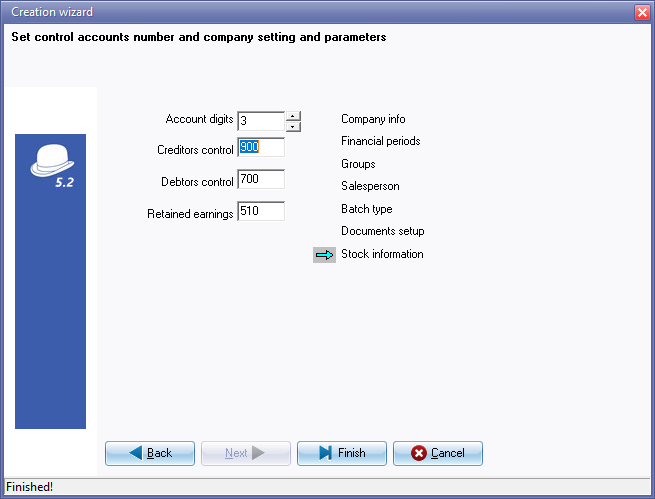
- Click on the Finish button. The new Set of Books will automatically be opened automatically and now ready to work in.
|
|
Before you can commence any processing, you need to create your general ledger accounts, bank account, tax accounts, debtor accounts, creditor accounts, etc. and check or change your settings and parameters. This should not take much time, but could save you lots of extra work and frustration, since the key to the success in your processing and reports, is in the setting up of the TurboCASH5.2 program. |
Steps after creating the Set of Books (Advanced)
Deactivate / Activate the Bank import plugin
By default, the Bank import plugin setting activated.
The Default bank reconciliation option (Setup → System parameters on Setup ribbon) is not selected. This will ask for the Bank import plugin,which is a commercial plugin.
|
|
Bank import plugin - Bank Reconciliations Plugin Manual - BankImport Plugin Manual - Shop - Once-off license - The Bankimport plugin will import bank transactions and save you hours of data entry. You can simply link transactions to your debtors, creditors or other accounts. And with a simple mouse click link the payments to the right invoices. Needs to be activated on the Setup ribbon, select Setup → System Parameters. |

If you do not intend to wish to use the Bank import plugin at this stage, you need to turn the Bank import plugin off (Tick (select) the Default bank reconciliation option (Setup → System parameters on Setup ribbon)).
The Bank import plugin can be activated when the Bank import plugin is purchased.
If bank Bank import plugin is not activated, separate Payments and Receipt batches will be created when you create (add) Bank accounts on the Bank tab (Accounts on Setup ribbon).
Customise labels for Document types
You may need to customise labels and fix records.
Change the descriptions on the Types tab on Tools → Customise languages (Setup ribbon). If you have a different language than English, you need to translate the descriptions for your language or specific requirements.
Document types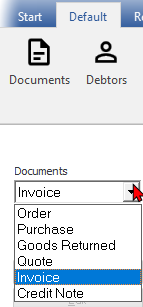 5
5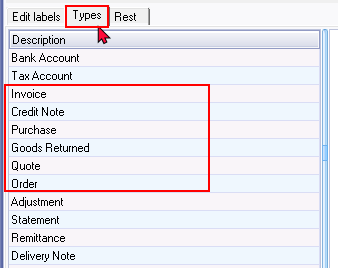
"Goods Returned" - change to Supplier return to be consistent with the other labels in the language file.
The Document type (i.e. Invoice, Credit note, Quote, Purchase, Supplier return or Order) is stored and edited 1n the Tools → Customize language (Setup ribbon).
It should print the Document type (i.e. Invoice, Credit note, Quote, Purchase, Supplier return or Order) as this is more correct for the recipient of these documents.
If you need to print documents using the document layout files supporting one (1) Layout file for all document types), it is recommended that the Document types are edited and / or translated to the singular in the Types tab Tools → Customize language menu (Setup ribbon).
Change Edit Groups
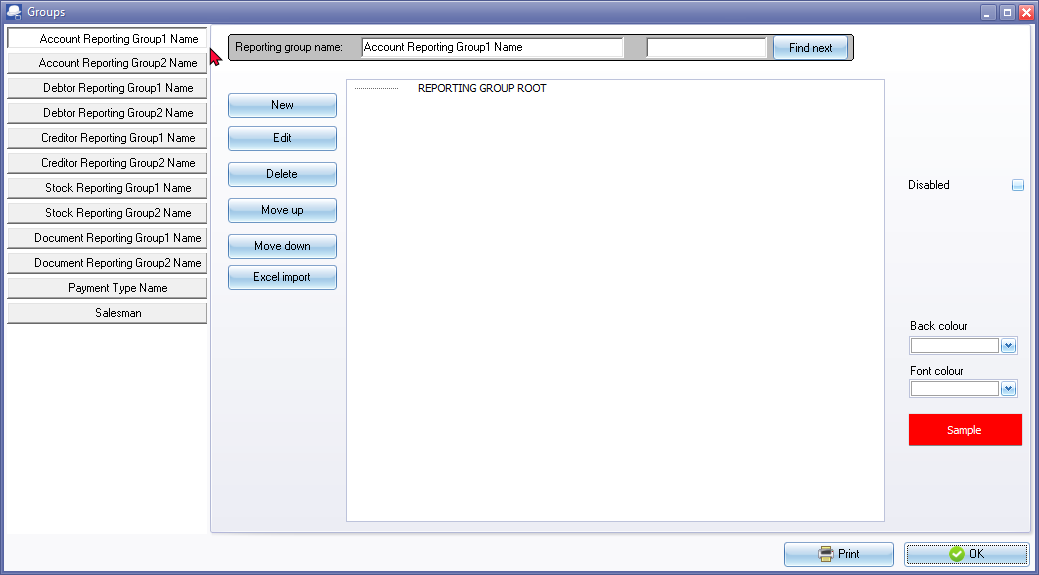
Change the reporting group names (descriptions) of the Groups (Setup ribbon).
You may also add groups for reporting groups, if necessary.
|
|
The name must not already exist and may not be longer than 50 characters. This name will help you to identify the Set of Books on your system. You will need to select this name whenever you need to open the Set of Books or perform some other functions on the Set of Books. |
The following groups are not included if the Set of Books was created using Create Set of Books (Advanced) option:
- Projects - You may create groups for Projects. These Projects may be activated in batches and documents. Once the batches and / or documents are posted (updated to the ledger), you may generate various reports for each Projects on the Sidebar of the Default menu.
- Cost centre 1 and / or Cost centre 2 -
- Languages - Multi-Language accounts
|
|
Multi-Language accounts - Manual - Shop - Once-off license - This plugin makes it possible to translate the ledger and group names in multiple languages. It is already possible to choose different languages for the interface (the buttons). But this plugin makes it possible to do the accounting in different languages. Per user you can select a language, so the user can account in his/her own language. The set of books can be viewed in different languages, therefore it is possible an employee enters information into an English Set of Books and a bookkeeper, auditor, etc. can see the set of books in a set language, e.g. Afrikaans, Dutch, etc. |
Add missing Groups and Paper types in the Types table
To add missing groups:
If you intend to use Projects, Cost centres and / or Multi-language Set of Books, you need to add these Groups manually:
- Activate the SQLBrowser plugin in Tools → Activate plugins (Setup ribbon)
- Launch the SQLBrowser plug-in Plugins → Tools → SQLBrowser (Setup ribbon).
- Select the "TYPES" table.
- Right-click and select "Open" on the context menu.
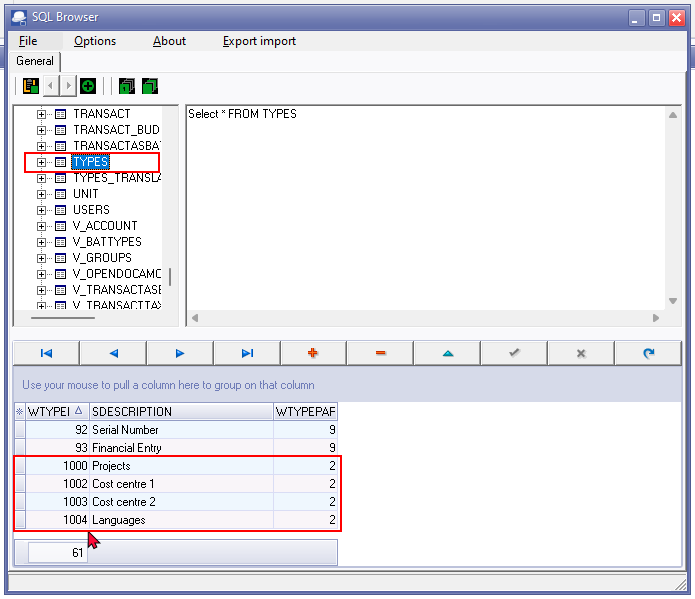
- Select the last record WTYPEID - 93 in the TYPES table. Insert or Add a new record (you may also use the down arrow on your keyboard).
- Add Groups - Optional - If you are planning to use any of the following features in TurboCASH5.2, you may add the groups, as required. To do this, type the following records and type 2 in the WTYPEPARENT column:
- 1000 - Projects
- 1002 - Cost centre 1
- 1003 - Cost centre 2
- 1004 - Languages
- Add Paper types - Type the following records and type 5 in the WTYPEPARENT column:
- 55 - Till slip
- 56 - New plain
- Close the SQLBrowser
|
|
SQLBrowser - Manual - Shop - Once-off license - Activate the SQLBrowser plug-in Tools → Activate Plugins (select Tools → SQLBrowser and click Activate plugin) on the Setup ribbon. |
The groups will be added on Setup → Groups
