Group columns
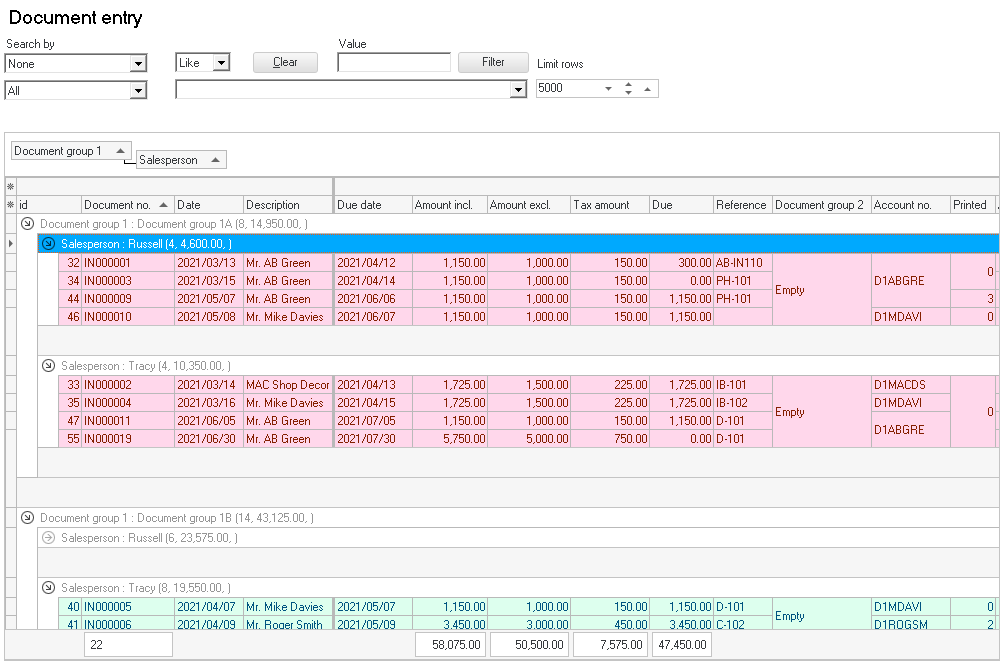
If the “Single line mode” option is not selected (tick removed), a column header "Use your mouse to pull a column here to group on that column" will be displayed and the similar data in columns will be grouped.
Select a column and click on it. While holding the mouse button down, drag it to the "Use your mouse to pull a column here to group on that column" bar. Select any other column to drag and drop it on the the "Use your mouse to pull a column here to group on that column" bar. You may select as many columns, as necessary, to group your data.
You may also drag and drop these columns to the right or left to change the grouping of these columns.
|
|
If you wish to retain your layout, click on the Save grid layout button. |

To remove a column from the "Use your mouse to pull a column here to group on that column" bar, you may use the following two (2) options:

- Select the column heading (e.g., “Document group”) on the "Use your mouse to pull a column here to group on that column" bar, and drag it to the first line (above the column headings). When the mouse pointer change to a big X, drop it. The column will automatically be placed in the correct default sequence (or the place of the previous saved grid layout).
- If you wish to change the column to a specific place, select the column heading (e.g., “Document group”) on the "Use your mouse to pull a column here to group on that column" bar, and drag it to the second line (column headings). When you drop it, the column will be added to the selected position or sequence of the columns.
|
|
If you wish to retain your layout, click on the Save grid layout button. |